Mod, mod, mod
Moderators: Aladinsaneuk, MartDude, D-Rider, Moderators
Cheers Nooj, flattened the chip down first like you said then fixed it using my Mer Scratch repair kit I'd almost forgotten about. It's is an awesome piece of kit, even comes with a video  and i made the repair and can't even see where it used to be. A numpty like me was able to produce a professional finish on this and one other stone chip. I'm well impressed - very proud of myself

No worries
Here's a top tip, when you're making yourself some LED indicators, once they're all soldered up and have been given a quick spray of paint to keep the damp out, and are sitting in the oven ready to be dried off, DO NOT accidentally set the oven to 'microwave' instead of 'bake' because the resistors will rapidly heat up, set the paint on fire and not work afterwards.

Here's a top tip, when you're making yourself some LED indicators, once they're all soldered up and have been given a quick spray of paint to keep the damp out, and are sitting in the oven ready to be dried off, DO NOT accidentally set the oven to 'microwave' instead of 'bake' because the resistors will rapidly heat up, set the paint on fire and not work afterwards.


No damage done to the oven, I stopped it instantly and just blew the fire on the burning board out as it really was tiny. The indicators still work as well 
However, having finished fitting them, I'm not sure I like them now. they look pretty crappy close up and are effectively useless in the day light as you can't see them. Still, they'll get me through the MoT. I'll run with them for this year and see how I get on. I've got a mate who does plastic welding and bike panel repairs, so if I still don't like them next year I'll get him to fill in the holes and spuce up the fairing a bit, get rid of the stone chips as well.
At the moment I'm doing battle with my HID kit which isn't as easy as I thought it would be. I've had to file around the base of the bulb to get it to sit squarely in the hole and make up a spacer to go behind it so the retaining spring holds it in place. With all the extra wiring getting the fairing back on is going to be a two person job, so I'm sat waiting for my Missus to stop work so she can help me.
SHINY BIKE SYNDROME Motorcycle valeting and paint protection specialist.
Aladinsaneuk wrote:andy is having a VERY heavy period
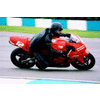
Right, finally done it and got some pictures taken.
This is Phase Two, getting indicators flush fitting in the front of the fairing (to pass an MoT, both indicators must be visible from the front of the bike).
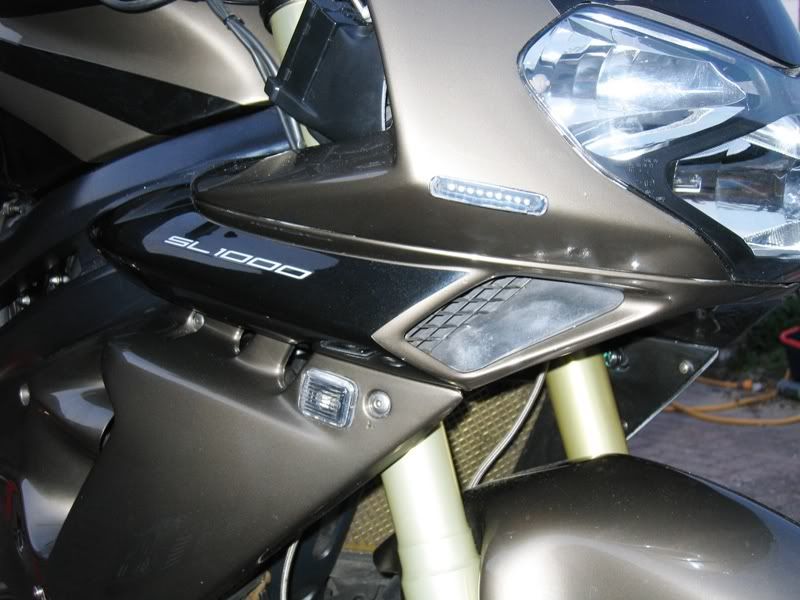
They're no where near as bright as I was expecting and point down too far for my liking, with the fairing off the bike it was difficult to judge their aim.
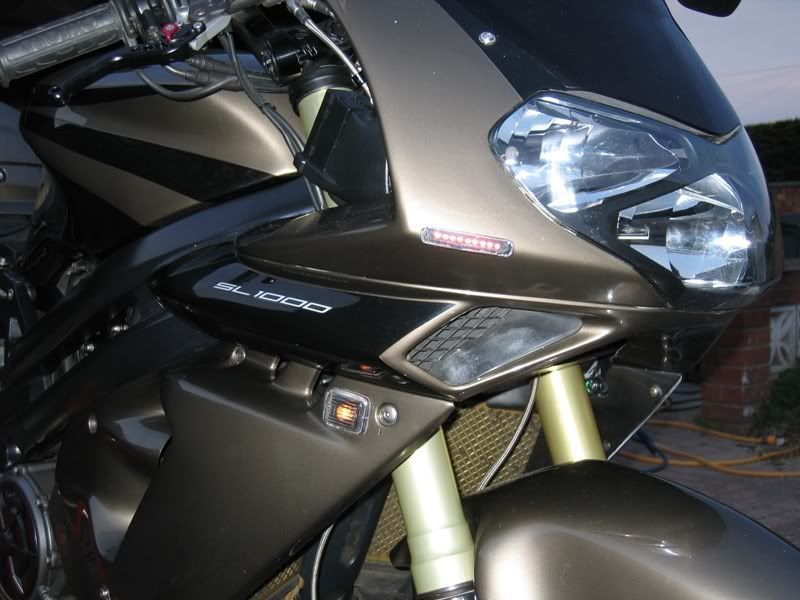
They look ok from a distance and the front of the bike is nicely cleaned up without two big things sticking out of the sides.

Next problem... with one side flashing, the other side also comes on very faintly. This only happens with the front ones, the side repeaters and the rear ones (also my LED work) work perfectly fine. Feck knows why, but I've pretty much had enough of them today.
This is Phase Two, getting indicators flush fitting in the front of the fairing (to pass an MoT, both indicators must be visible from the front of the bike).
They're no where near as bright as I was expecting and point down too far for my liking, with the fairing off the bike it was difficult to judge their aim.
They look ok from a distance and the front of the bike is nicely cleaned up without two big things sticking out of the sides.
Next problem... with one side flashing, the other side also comes on very faintly. This only happens with the front ones, the side repeaters and the rear ones (also my LED work) work perfectly fine. Feck knows why, but I've pretty much had enough of them today.

Yeah, it's a current drain issue (or lack there of). Thing is, the indicators I took off (which I also made) have no resistors across them and they work fine. Mind you, they were three banks of five in parallel, these are nine LEDs in parallel with a 330ohm resitor on the input. PITFA!!!!! I've had the front on and off all day and I really don't want to have to take the feckin thing to bits again tomorrow! Big-sweaty-flea-bitten-pus-filled-donkey's-ball-bag! 
SHINY BIKE SYNDROME Motorcycle valeting and paint protection specialist.
Aladinsaneuk wrote:andy is having a VERY heavy period
Well, I'm buggered if I can get the damn things working, big feck'n hairy arses! I've disconnected them for the MoT. The side repeaters work perfectly and are *just* visible from the front of the bike, so I'm hoping the bike will still pass, though personally I wouldn't let it through.
I've done a few other jobs on it as well, (I was only waiting for a UK headlight to arive from KJM, but thought "Hmmm, while the fairing's off I could just... you know how it is) I stuffed some spare Wolf exhaust baffles I had laying around the garage into my noisy and very un-legal Renegade cans, they're BS marked baffles so they should pass the MoT OK.
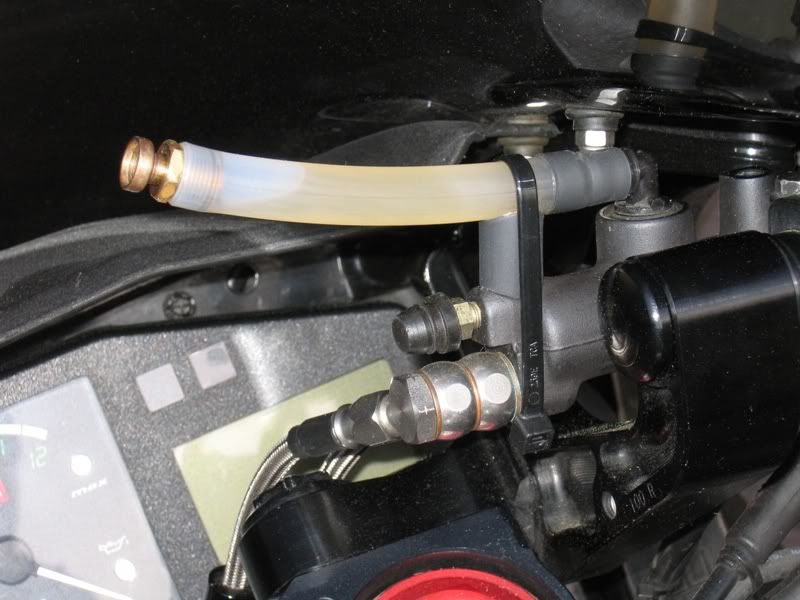
I've also made myself some better brake and clutch reservoires. I had to bin the originals so my Variobars would clear the fairing, I did a temprorary fix with a couple of loops of silicon tubing to hold the fluid, but they sweated and the fluid got all cloudy and nasty. Everything still worked, but it looked like shit shite. "A real Blue Peter Job" as one of the Futura guys said at last year's Aprilia day
So I 'aquired' some nylon tubing and a couple of non-return valves from work which should do the job very well. The valves in the ends of the tubes will let air into the top of the reservoirs if fluid needs to be sucked down into the caliper, but won't let anything back out. I made a couple of little props out of the same tubing and some heatshrink to stop them wobbling around on the move. All the heatshrink is hot-melt adhesive lined, so there shouldn't be any leaks any where.


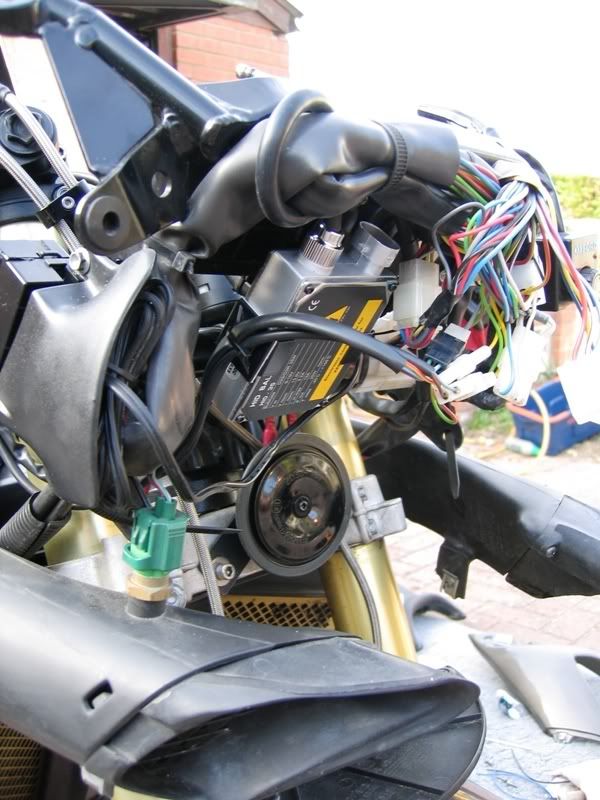
I fitted the HID kit (a full car kit which Aladin and meself went halves on) and did a wee wiring mod so the headlight stays on when I switch to main beam.
I stuck the ballast here, using one of the dash mounting screws and tie-wrapping the bottom to the fairing bracket. It was a bit of an effort to squash the wiring down and get the fairing back on, but it gave in eventually.

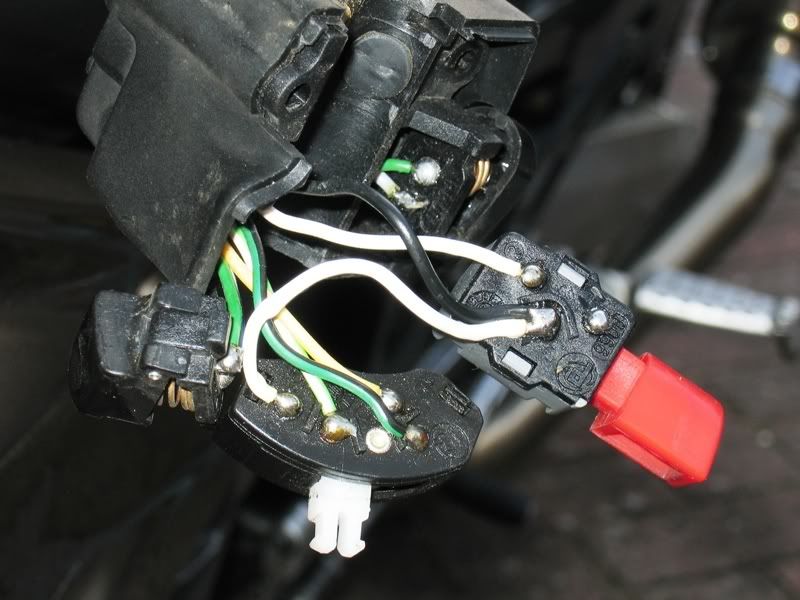
This is the wiring mod, I found it on the AF1 forum but took some pictures myself as the ones on their thread aren't showing. It's the black wire on the high beam switch that gets moved.
Before:

After:
Hopefully, the MoT tester won't be too picky and I can actually get to ride the bloody thing before Christmas!
I've done a few other jobs on it as well, (I was only waiting for a UK headlight to arive from KJM, but thought "Hmmm, while the fairing's off I could just... you know how it is) I stuffed some spare Wolf exhaust baffles I had laying around the garage into my noisy and very un-legal Renegade cans, they're BS marked baffles so they should pass the MoT OK.
I've also made myself some better brake and clutch reservoires. I had to bin the originals so my Variobars would clear the fairing, I did a temprorary fix with a couple of loops of silicon tubing to hold the fluid, but they sweated and the fluid got all cloudy and nasty. Everything still worked, but it looked like shit shite. "A real Blue Peter Job" as one of the Futura guys said at last year's Aprilia day
So I 'aquired' some nylon tubing and a couple of non-return valves from work which should do the job very well. The valves in the ends of the tubes will let air into the top of the reservoirs if fluid needs to be sucked down into the caliper, but won't let anything back out. I made a couple of little props out of the same tubing and some heatshrink to stop them wobbling around on the move. All the heatshrink is hot-melt adhesive lined, so there shouldn't be any leaks any where.
I fitted the HID kit (a full car kit which Aladin and meself went halves on) and did a wee wiring mod so the headlight stays on when I switch to main beam.
I stuck the ballast here, using one of the dash mounting screws and tie-wrapping the bottom to the fairing bracket. It was a bit of an effort to squash the wiring down and get the fairing back on, but it gave in eventually.
This is the wiring mod, I found it on the AF1 forum but took some pictures myself as the ones on their thread aren't showing. It's the black wire on the high beam switch that gets moved.
Before:
After:
Hopefully, the MoT tester won't be too picky and I can actually get to ride the bloody thing before Christmas!
Heh, I thought i was bad for tinkering for tinkerings sake but you win nooj. Also helps that yours is far more profesionally done aswell
Just a note on them cool fluid holders. I made a temporary one for the back brake using just the tube and the tester failed it (ignored the plate and exhaust) but mine didnt have 1way valves on, i melted it shut *cough* with a soldering iron *cough*
led's are the future, persevere young padwan.
Just a note on them cool fluid holders. I made a temporary one for the back brake using just the tube and the tester failed it (ignored the plate and exhaust) but mine didnt have 1way valves on, i melted it shut *cough* with a soldering iron *cough*
led's are the future, persevere young padwan.